Wall Coping Installation Guide

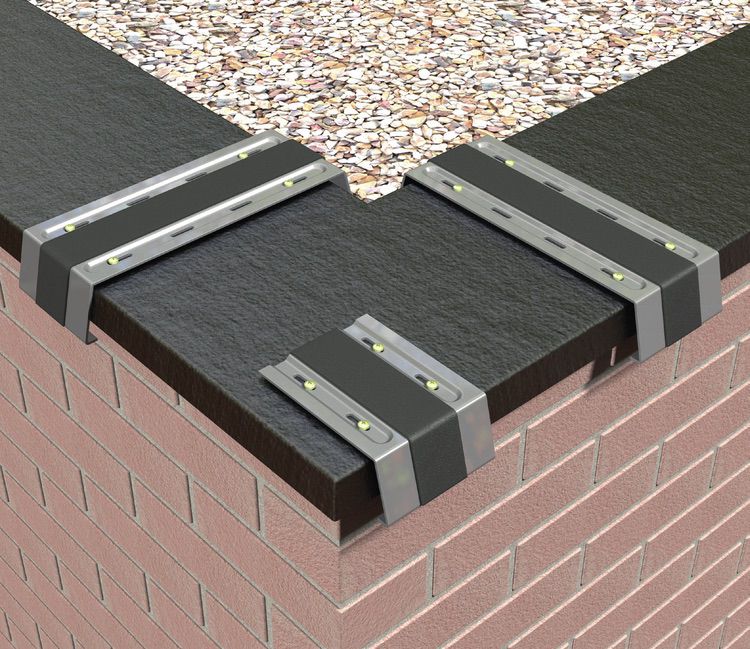
Skyline wall copings are pressed formed rectangular profiles with acute angled front and rear folded edges which clip over fixing straps and are secured to the top of a wall section. Coping lengths are butt jointed over the fixing straps and compresses an EPDM seal for weathered protection and decorative finish.

Skyline-Coping-Installation

1) Ensure minimum 18mm marine ply and weatherproof membrane is fitted to the structure before commencing with the installation (all supplied by others).

Skyline-Coping-Installation
2) Position bracket with EPDM seal centrally over the wall. Maintain a minimum 10mm gap from the bracket inside return edge to the external wall surface finish. Illustration shows a render finish option which may be applied after installation of coping.
Skyline-Coping-Installation
3) Secure brackets with minimum size No.12 x 50mm sized screws using the outer slots in the fixing straps at 1.5m maximum centres or as recommended based on wind uplift calculations or coping size. Additional screw fixings will be required on wider fixing straps. Minimum 70mm from fixing screw centre to the outer edge of the coping. 2. Position bracket with EPDM seal centrally over the wall. Maintain a minimum 10mm gap from the bracket inside return edge to the external wall surface finish. Illustration shows a render finish option which may be applied after installation of coping.
Skyline-Coping-Installation
4) Always secure additional half brackets for corners and piers with the first fixing point with a minimum of 40mm from the external wall finish.
Skyline-Coping-Installation
5) Locate the corner, and clip the coping edge angle under the bracket from the front whilst slowly pressing the coping section into place to compress the EPDM seal on the brackets. This also applies to a pier and stopends.
Skyline-Coping-Installation
6) Ensure 31mm dimension is maintained from external wall surface finish to external face of coping. On deeper edged coping that exceeds the normal 75mm leg, it may be necessary to use a small self tapper on the coping return to secure it fully.
Skyline-Coping-Installation

7) Starting at a corner working to your next junction,
the last section of coping can be cut down on site to accommodate any variant dimensions between corner, pier and stop ends. Use touch up paint on cut edges. Contractor to use correct metal work tools, such as a circular saw.

Skyline-Coping-Installation

8) Maintain 3-4mm expansion gap at all joints.

Rather download this guide?